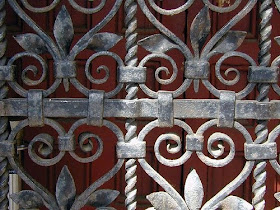
Terry Ross of DrawMetal has been in touch with me for a couple of years now, showing me his cool geometric plugins for metal design. (And everyone knows I'm a sucker for anything related to geometry.)
DrawMetal provides three plugins (all free):
CurveMaker draws several types of spirals. These would be extremely tough to draw using SketchUp's default toolset - lines and arcs won't get you very far! (Bonus: you don't need to know any math to draw these curves.)
TaperMaker enables you to extrude a cross-section along a path, with different sizes at either end of the path. This is akin to the Follow Me tool, but your cross-section grows or shrinks incrementally with each curve segment.
And finally, Stock Maker enables you to calculate quantities (volume) of material you'll need to make your model. It can also calculate cost and weight.
The obvious audience for these plugins is artists, blacksmiths, metalsmiths, jewelers, sculptors, and metal fabricators. But they are also quite useful for anyone who wants to draw 2D and 3D curves, and/or tapered extrusions.
First thing to know when using a plugin: its is simply a Ruby script file whose extension is RB. Once you have the RB file, just place it in the "Plugins" folder within the SketchUp installation. Then in SketchUp, you can find the new tool under the Plugins menu. These DrawMetal tools also have convenient toolbars you can download. (This is all explained on this page.)
Here's are a few things I made after playing around for a short time:
Spiral
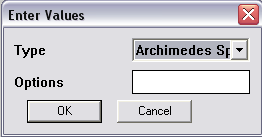
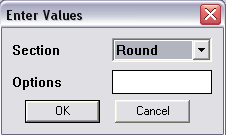
First you need to use Curve Maker (from the main menu, choose Plugins/ Curve Maker / Draw a Curve). I chose the Archimedes Spiral, with no extra options, then clicked OK.
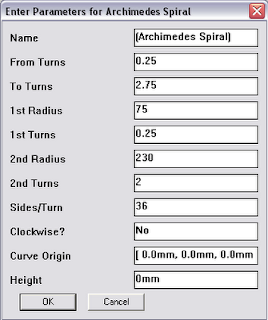
The parameters below set the spiral geometry. It will start at a quarter turn (90 deg) and end after 2 and 3/4 turns. At a quarter turn, the radius is 75 mm, and at 2 full turns, the radius is 230 mm.
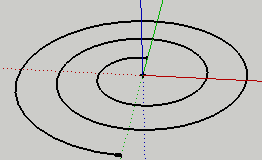
Here's the spiral, in the red-green plane. It's created as a group. (If you explode it, it will become a curve, and you can explode it once more to break it into its individual segments.)
(If you want to create curves by clicking points, and not by entering parameters in a data window, you can use the Draw / Curve Maker menu. This video and this video provide more info.)
Once the curve is complete, you can view its data. Select it first, then choose Plugins / Curve Maker / Display Curve Data. You can even add the data to your model as a Sketchup text object.
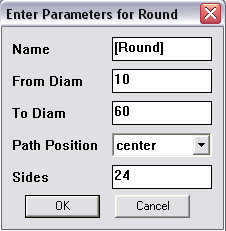
To make the curve 3D, you use Taper Maker. First, select the curve, then choose Plugins / Taper Maker / Draw a Taper. There are a few cross-sections you can use; I used Round for this one.
For the parameters, I defined the start and end diameters.
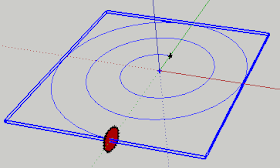
Before completing the taper, you're shown where the start and end sections are, and can switch them if you want.
Here's my completed taper, after softening the edges. It's still a group. And you can display its properties by selecting it and choosing Plugins / Taper Maker / Display Taper Data.
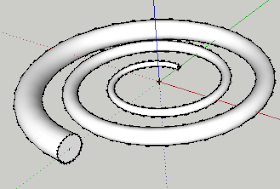
Note that you can use Taper Maker on ANY SketchUp lines or arcs, not just those created by Curve Maker.
Helix
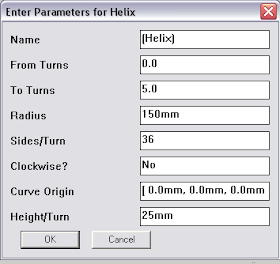
This time I started Curve Maker and specified Helix. This one will start at zero turns (0 degrees) and end after 5 complete turns. Each turn is 25mm high.
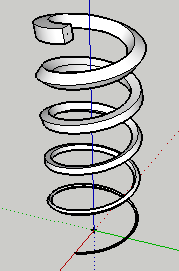
After completing the helix, I selected it and ran Taper Maker with a square cross-section. Very cool result:
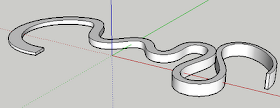
Spline
This object should be a turn-on for anyone who likes free-form curve drawing. You start with a set of lines, whose endpoints define points along the spline.
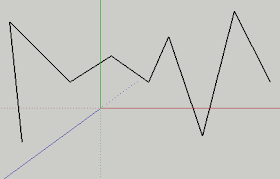
Select the edges, activate Curve Maker, and choose the Cornu Spline curve. The resulting spline is shown below in black.
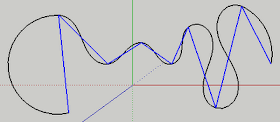
The original edges are still selected, so you can press the Delete key to erase them, leaving just your spline.
For the spline's taper, I used a rectangular cross-section. It starts at 250 x 50 (horizontal) at the left side, and ends at 50 x 250 (vertical) at the right.
These are extremely useful tools, and fun to use. Try them out!
Anyone can design anything in 3D! www.3dvinci.net
Fantastic - have just downloaded these. Using Sketchup to design architectural joinery elements has just got a whole lot easier! From cabinets to cornices / skirtings / brackets etc...
ReplyDeleteLeigh Brooks,
Brooks & Ware Architects, UK
www.brooksandware.com
These are great! Thank you so much. It was very hard for me to find a good helix drawing tool, I'm so glad I came across this. The instructions are well done and make the tools easy to learn, something that many plugins lack. If you can, you should try and make these a part of the SketchUp Plugins Warehouse, it might make it easier for more people to find them.
ReplyDelete