This time the featured plug-in is called Joint Push Pull. Now that I've used it, I don't know how I lived without it (OK, slight exaggeration).
The original plug-in can be found here. (There appears to be a more recent version on www.sketchucation.com but I was having login problems and was unable to download attachments.) To install the plug-in, download the ZIP file and place all its contents into the "Plugins" folder of your SketchUp installation. There's also a link to download the documentation (PDF).
Here are the two icons for the plug-in. I didn't play with Vector Push Pull (the icon on the right), this post is about Joint Push Pull (the icon on the left).

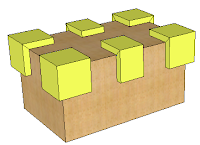
One thing this plug-in can do is push or pull multiple faces at once. As a simple example, I made a box with some side and corner pieces, shown in yellow below).
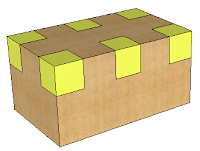
First you select the faces you want to pull (a face's right-click menu has a conveient option for this: Select / All with same material). Then click the Joint Push Pull tool (also found in the Tools menu). You need to specify the pull distance, and "N" for privileged plane means all pulling will be normal to the face (like a regular Push/Pull). There are also options for what do with original faces, whether to create border faces, etc.

Set your options, click OK, and all faces are pulled out at once. (Which would be rather a pain to do with the regular Push/Pull tool.)
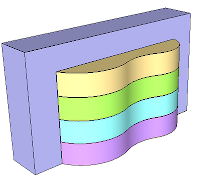
Here's another example, which shows how JPP can be used to pull or push curved surfaces, something impossible to do with SketchUp's provided tools. I started with this model comprised of wavy surfaces.
I used JPP on the green, cyan, and purple faces, each time with a larger extrusion distance.
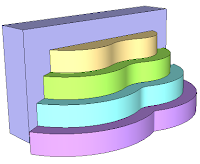
One thing to keep in mind: faces are projected outward or inward according to their slopes at either end. So in a case like this, the new faces don't line up with the dark blue rectangular face in the back (though this could be easily fixed with the Move tool).
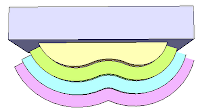
Here's another feature of JPP: you can pull out only certain segments of a face. To do this, you need to have hidden edges displayed (View / Hidden Geometry).
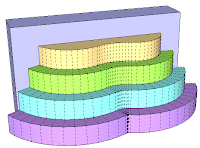
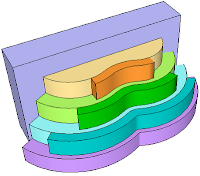
In this example, I selected a few segments each of the yellow, green, and cyan faces, and pulled them out all at once. After some smoothing of edges, adding a few edges, and applying some new colors, I got this:
Here's another example: a vase with projected circles all around. (I created the circles by using the Intersect tool on some cylinders, which I later erased.)
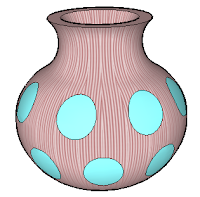
The vase on the left shows all cyan faces pulled outward. The vase on the right shows the faces pushed inward, which means a negative extrusion distance, and the option "Erase original faces."

Finally, JPP can be used to thicken a surface. I created this model using the sandbox tools. I projected and cut out a circle, and projected a square and painted the projected face yellow. I softened all edges except for those surrounding the yellow face (which involved a little trick - making the yellow face a group and then exploding it).
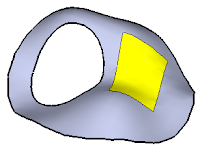
I ran JPP with the option "Reverse Faces (for thickening)." Maybe this doesn't occur with the updated version of JPP, but whether I used a positive or negative extrusion distance, my "front" faces ended up on the inside.
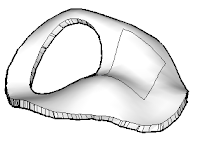
Which is easily fixed by selecting all faces and choosing Reverse Faces from the right-click menu.
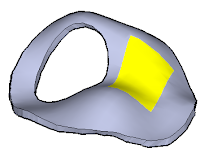
This is how the underside looks: the same circular cutout and the projection of the yellow face. The results aren't always perfectly clean, but small errors are easily fixed.
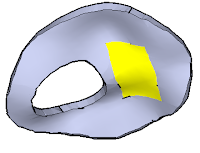
Give this plug-in a try; you'll find lots of uses for it.
Anyone can design anything in 3D! www.3dvinci.net
Hi Bonnie,
ReplyDeleteI downloaded joint push pull, dropped into my plugins, restarted computer and it is not showing up on my Mac. Do you have any idea as to why.
Thank you,
maureen
Did you check to see both the Tools menu and the Plugins menu? I"ve heard it sometimes occurs in one or both. Are you using Version 7.1?
ReplyDelete