I've seen a lot of buzz about Instant Roof, a plugin by Chuck Vali of Vali Architects. So today I had a chance to try it out - I downloaded the free version which is itself simply amazing.
As with most plugins, download the RBS file and place it in your Plugins folder inside the SketchUp installation.
I started with this building, which would be rather a pain to put a roof on manually:

I selected the four flat top faces:

Then I chose Plugins/ Instant Roof / Make Roof. There are a few styles to choose from; I picked Elizabethan. You can edit the default slopes, fascias, etc, but I kept the style as is. (You also have the option to save your own roof styles. And roof styles are not to be confused with SketchUp's display styles!)

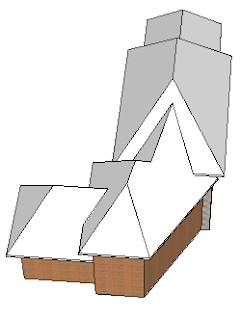
After clicking OK, here's the roof, which took about 1 second.

Each corner is handled perfectly, including the complex ones.

The default roof is hipped - sloped uniformly against all edges. But I wanted gables along front edges, so I used Undo to get rid of the roof I just made.
This time, not only did I select the top flat faces, I also selected the edges above which I wanted a gable.

Running Instant Roof with the same Elizabethan style produced this:

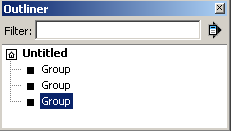
One thing I didn't see in any of the other write-ups was the face that several groups (not just one) are produced by Instant Roof, which you can see if you open the Outliner. (The Outliner needs to be CLOSED before running Instant Roof, however!)

Here are my three groups, in an exploded view:

Instant Roof doesn't stop there - it also enables you to add details and materials. Something to keep in mind if you want to add a material: that material needs to be added somewhere inside your model. Instant Roof won't search in your material libraries!
I wanted to add detail to the roof itself, so I opened that group for editing and selected all faces. (You can select only certain faces if you want different details).

Then I chose Plugins/ Instant Roof / Add Roof Details. I went with Mission Tiles with Materials.

The first step is applying the tiles themselves, which took maybe 20 seconds.

I was then asked which material, and the drop-down menu included all materials in my model. Beautiful results!

I then exploded the group that included the vertical roof faces, erased the dividing lines, and got seamless walls.

Here's something else neat: I tried the Ski Lodge style, and get a roof with rafters. The rafters are contained in their own group, and each identical rafter is a component. So can edit one rafter, extend or shorten it, and they all update. Love love love it!

So you can do all this with the Free version, but the Pro version (a steal at $39!) offers more styles, more customization options, etc.
Again, download this plugin here: Instant Roof. Vali's website also has detailed videos and very detailed PDF instructions.
Anyone can design anything in 3D! http://www.3dvinci.net/
No comments:
Post a Comment