Wednesday, November 24, 2010

Instant Roof is AWESOME

I have a whole chapter about creating roofs in my Basic Exercises book, focusing mainly on using directional and geometric constraints while drawing. And while these are still great exercises for learning the concepts of constraints, there's a new plugin that can save you hours of work.

I've seen a lot of buzz about Instant Roof, a plugin by Chuck Vali of Vali Architects. So today I had a chance to try it out - I downloaded the free version which is itself simply amazing.

As with most plugins, download the RBS file and place it in your Plugins folder inside the SketchUp installation.

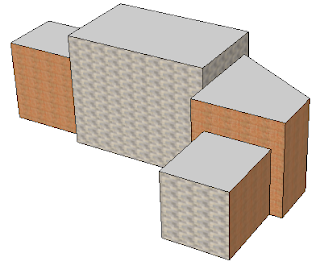
I started with this building, which would be rather a pain to put a roof on manually:

I selected the four flat top faces:
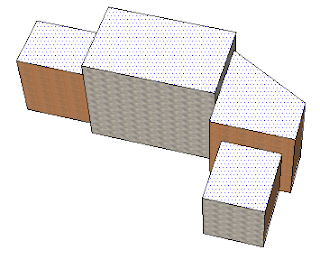
Then I chose Plugins/ Instant Roof / Make Roof. There are a few styles to choose from; I picked Elizabethan. You can edit the default slopes, fascias, etc, but I kept the style as is. (You also have the option to save your own roof styles. And roof styles are not to be confused with SketchUp's display styles!)


After clicking OK, here's the roof, which took about 1 second.
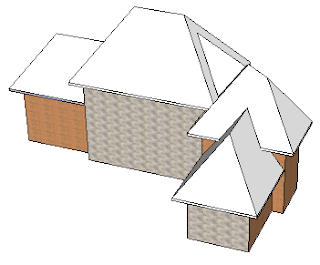
Each corner is handled perfectly, including the complex ones.
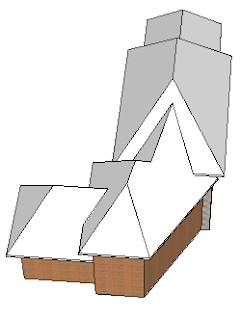
The default roof is hipped - sloped uniformly against all edges. But I wanted gables along front edges, so I used Undo to get rid of the roof I just made.

This time, not only did I select the top flat faces, I also selected the edges above which I wanted a gable.
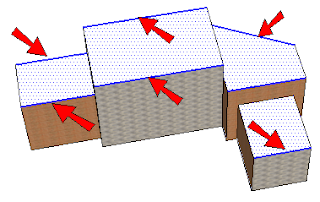
Running Instant Roof with the same Elizabethan style produced this:
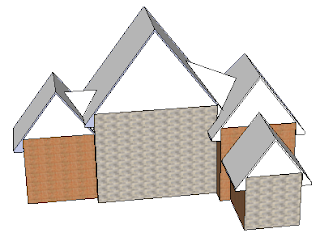
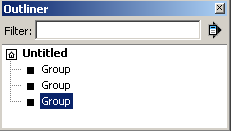
One thing I didn't see in any of the other write-ups was the face that several groups (not just one) are produced by Instant Roof, which you can see if you open the Outliner. (The Outliner needs to be CLOSED before running Instant Roof, however!)


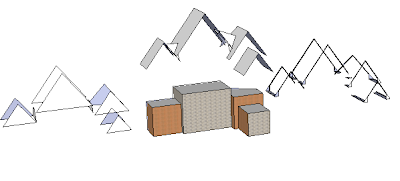
Here are my three groups, in an exploded view:
Instant Roof doesn't stop there - it also enables you to add details and materials. Something to keep in mind if you want to add a material: that material needs to be added somewhere inside your model. Instant Roof won't search in your material libraries!

I wanted to add detail to the roof itself, so I opened that group for editing and selected all faces. (You can select only certain faces if you want different details).
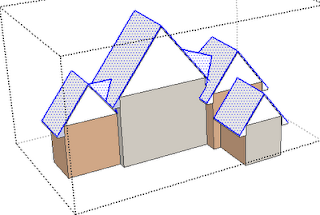

Then I chose Plugins/ Instant Roof / Add Roof Details. I went with Mission Tiles with Materials.


The first step is applying the tiles themselves, which took maybe 20 seconds.
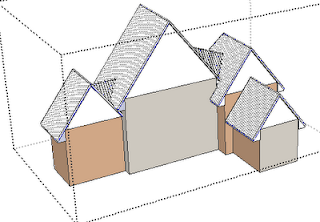
I was then asked which material, and the drop-down menu included all materials in my model. Beautiful results!
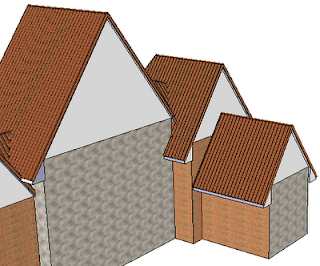

I then exploded the group that included the vertical roof faces, erased the dividing lines, and got seamless walls.
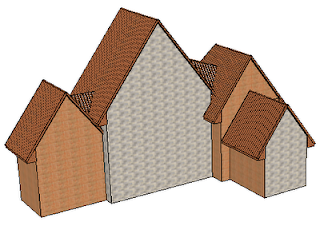
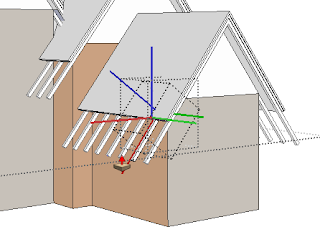
Here's something else neat: I tried the Ski Lodge style, and get a roof with rafters. The rafters are contained in their own group, and each identical rafter is a component. So can edit one rafter, extend or shorten it, and they all update. Love love love it!


So you can do all this with the Free version, but the Pro version (a steal at $39!) offers more styles, more customization options, etc.

Again, download this plugin here: Instant Roof. Vali's website also has detailed videos and very detailed PDF instructions.


Anyone can design anything in 3D! http://www.3dvinci.net/

Email Newsletter icon, E-mail Newsletter icon, Email List icon, E-mail List icon
Join our FREE Email Mailing List!


Monday, November 22, 2010

Math Forum: Hexagonal Pyramid

My November 2010 project for the Math Forum has just been posted. It's pretty simple - two different ways to create a hexagonal pyramid.


One method is to shrink the top of a hexagonal prism, and the other is creating faces by hand after setting the point at the tip.

What's always amazed me about SketchUp is how you can always come up with a few ways to complete the same project. If you do this project and come up with other methods, please let me know!


Anyone can design anything in 3D! http://www.3dvinci.net/

Email Newsletter icon, E-mail Newsletter icon, Email List icon, E-mail List icon
Join our FREE Email Mailing List!


Friday, November 12, 2010

3D Warehouse: the Wild, Wild West

The 3D Warehouse is like the Wild West - a big free-for-all. Anyone can go in there and add whatever they want.

Here's a useful blog post by my friend Eric Schimelpfenig, a kitchen/bath designer and SketchUp expert. He discussed a problem we've all had - downloading a 3D Warehouse model that's HUGE (or too tiny), and you need to change its size to fit your model.

For example, he found a dinner plate that could crush not only the table, but the entire kitchen:


And a knife that could slice an entire house (or an entire neighborhood):


A simple use of the Scale tool solves the problem in most cases, and you can also use the Tape Measure for exact sizing.

Eric also lists a few kitchen/bath collections in the 3D Warehouse that are of high quality, so you won't get stuck with UFO-sized coffee cups!


Anyone can design anything in 3D! http://www.3dvinci.net/

Email Newsletter icon, E-mail Newsletter icon, Email List icon, E-mail List icon
Join our FREE Email Mailing List!


Monday, November 8, 2010

Amazing Escher Patterns!

I got an email recently from Steve Armstrong, a math professor at LeTourneau University. He uses my GeomeTricks books, and one of his geometry students produced some amazing Escher-like tessellations. The student's name is Garret Robbins, and I uploaded 6 of his models to the 3D Warehouse.

There are some based on rectangles (click a model's images to go to its 3D Warehouse page):

Ninjas


Babies and Monsters (the babies are upside-down)


Animals


Samurais:


One tessellation is based on a triangle:


And my favorite is based on a hexagon:


Here's what Garret had to say, on how he came up with these patterns:

I just started with a shape (a square, rectangle, triangle, etc.), and simply drew a few lines here and there on each side, copying them to the appropriate opposite side. After that, I just tried to see what kind of artistic figure I could make out of the shape that I had created. On a few, I adjusted the entire tile to fit more closely to some figure that the tile resembled. Otherwise, it was just random.

I posted a project on the Math Forum last year on how to make rectangular Escher patterns. Go here, and scroll down to October 2009. Triangular and Hexagonal patterns are similar; both involve copying lines and arcs from one polygon edge to others.


Anyone can design anything in 3D! http://www.3dvinci.net/
Email Newsletter icon, E-mail Newsletter icon, Email List icon, E-mail List icon
Join our FREE Email Mailing List!


Our November Projects

Next week, on Nov 15, all subscribers to our Projects of the Month will be getting some great stuff!

Rendering for Free with Kerkythea

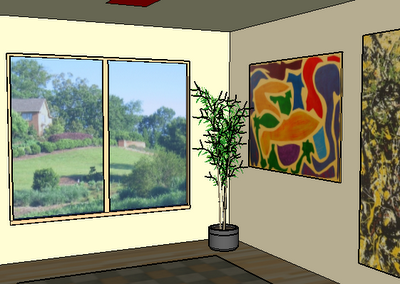
This is the first project of (hopefully) a bunch, which will help you go beyond SketchUp and show how to make beautiful renderings of your models. Kerkythea is a free application, which can take a cartoon-like SketchUp model like this . . .


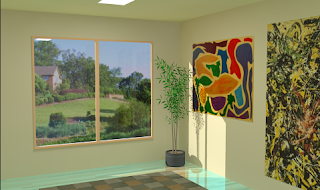
. . . and with a few settings and clicks, you'll produce this realistic-looking rendering, complete with outdoor and indoor lights, as well as correct shadows.


Hexaflake Animation

One of the October projects showed how to make a hexaflake, a 2D fractal created from a single hexagon. This project shows how to use scenes and layers to animate the hexaflake's progress.


Fireplace Mantel

This project shows how to use the fun Follow Me tool to easily make an intricate-looking mantel above a fireplace.


This is a not-to-miss month! Subscribe here.


Anyone can design anything in 3D! http://www.3dvinci.net/
Email Newsletter icon, E-mail Newsletter icon, Email List icon, E-mail List icon
Join our FREE Email Mailing List!


Tuesday, November 2, 2010

Updated: Our Free Teacher Guide, for SketchUp 8

Many readers have found 3DVinci thru our free Teacher Guide, which I've provided to give teachers some ideas about the many ways they can use SketchUp with their students.

Of the 9 projects in the Guide, only 2 needed substantial updates - these are the projects that integrate with Google Earth. In SketchUp 8, the Earth -> SketchUp interaction is much more streamlined, with less of the back-and-forth you needed in previous versions.

The Science / Geography project for Grades 1 - 5 involves finding a volcano, building a model on or inside it, and viewing that model in Google Earth. View the PDF for this project.


The Geography / History project for Grades 10-12 involves finding a site on which to build a model, choosing what model to create, and viewing that model in Google Earth. View the PDF for this project.


Other projects in the Teacher Guide are for math, art, and general 3D design. Check it out - it's sure to spark your creativity!


Anyone can design anything in 3D! http://www.3dvinci.net/

Email Newsletter icon, E-mail Newsletter icon, Email List icon, E-mail List icon
Join our FREE Email Mailing List!